
当たり判定と空戦
【実際】
〔当たり判定のNasalコードの取得と配置〕
・http://www.flightgear.org/forums/viewtopic.php?f=4&t=1709&st=0&sk=t&sd=a&start=45#p13991よりNasalコードをコピー.以下に全文を記します。
・コピーをここの例ではtest_impact.nasと名付け、p-kikkaの/Nasalディレクトリに置きます。
#### Test purpose only
var test_impact = func() {
var impactNodePath = getprop("ai/models/model-impact");
var targetNodePath = nil;
# If the impact type is not "terrain", we are in the case of a direct impact on an AI, MP aircraft, carrier...
# TODO: depending on type of ammunition (i.e heavy bomb),
# if the target is on ground and near the impact, he would be damaged too.
# Or in the case of Air-to-Ground bombing if the aircraft is too close
# of the impact point, he could be damaged too (blast effect).
if(getprop(impactNodePath~"/impact/terrain") != "terrain") {
var impactGeoCoord = geo.Coord.new();
var targetGeoCoord = geo.Coord.new();
var impactDistance = nil;
### debug
var windowTip = screen.window.new(nil, -25, 10, 10);
### end debug
impactGeoCoord.set_latlon(getprop(impactNodePath~"/impact/latitude-deg"), getprop(impactNodePath~"/impact/longitude-deg"), getprop(impactNodePath~"/impact/elevation-m"));
var aiModelsList = ["multiplayer", "aircraft", "tanker", "carrier"];
foreach(var i; aiModelsList) {
var modelsNodes = props.globals.getNode("/ai/models").getChildren(i);
foreach(var j; modelsNodes) {
targetGeoCoord.set_latlon(j.getNode("position/latitude-deg").getValue(), j.getNode("position/longitude-deg").getValue(), j.getNode("position/altitude-ft").getValue()*0.3048);
impactDistance = impactGeoCoord.direct_distance_to(targetGeoCoord); # in meter
if(impactDistance < 250) {
targetNodePath = j.getPath();
### debug
var targetCallsign = j.getNode("callsign").getValue();
windowTip.write("Target may be hit: "~targetCallsign);
### end debug
var impactOffsets = global_to_ai_coord(targetGeoCoord, impactGeoCoord, targetNodePath, impactNodePath);
# TODO: pass the array impactOffsets over MP to the target.
}
}
}
}
}
var global_to_ai_coord = func(targetGeoCoord,impactGeoCoord,targetNodePath,impactNodePath) {
# Transform impact coordinates from X,Y,Z earth system coordinates into the
# target (AI, MP aircraft...) own system coordinates.
# Return an array => [x-offset,y-offset,z-offset,yaw-offset,pitch-offset,speed,slug]
# x-offset>0 is foreward, y-offset>0 is left, z-offset>0 is up.
# yaw-offset is impact azimuth, in degrees, relative to the "target" aircraft's nose. Right is positive.
# pitch-offset is impact elevation, in degrees, relative to the "target" aircraft's pitch. Up is positive.
# speed (of the submodel causing the impact) is in meter/sec.
# slug is the mass of the submodel causing the impact (slug to kgs->14.593, slug to lbs->32.174).
var D2R = math.pi / 180;
var R2D = 180 / math.pi;
var targetX = targetGeoCoord.x();
var targetY = targetGeoCoord.y();
var targetZ = targetGeoCoord.z();
var impactX = impactGeoCoord.x();
var impactY = impactGeoCoord.y();
var impactZ = impactGeoCoord.z();
var rho = math.sqrt(targetX*targetX + targetY*targetY + targetZ*targetZ);
var phi = math.acos(targetZ/rho);
var theta = 0;
if(targetX >= 0)
theta = math.asin(targetY/(math.sqrt(targetX*targetX + targetY*targetY)));
else
theta = math.pi - math.asin(targetY/(math.sqrt(targetX*targetX + targetY*targetY)));
# X,Y,Z is right-handed coordinates system, so positive angle are anti-clock wise
theta = 2*math.pi - theta;
phi = 2*math.pi - phi;
#print("Impact coord. step 0: "~impactX~" "~impactY~" "~impactZ);
# step 1: rotate X,Y,Z coordinates of theta degrees along Z axis
var impactCoordX = impactX*math.cos(theta) - impactY*math.sin(theta);
var impactCoordY = impactX*math.sin(theta) + impactY*math.cos(theta);
var impactCoordZ = impactZ;
#print("Impact coord. step 1: "~impactCoordX~" "~impactCoordY~" "~impactCoordZ);
# step 2: rotate X,Y,Z coordinates of phi degrees along Y axis
var impactCoordX2 = impactCoordX*math.cos(phi) + impactCoordZ*math.sin(phi);
var impactCoordY2 = impactCoordY;
var impactCoordZ2 = -1*impactCoordX*math.sin(phi) + impactCoordZ*math.cos(phi);
#print("Impact coord. step 2: "~impactCoordX2~" "~impactCoordY2~" "~impactCoordZ2);
# step 3: move X,Y,Z of rho along Z axis
var impactCoordX3 = impactCoordX2;
var impactCoordY3 = impactCoordY2;
var impactCoordZ3 = math.abs(impactCoordZ2) - rho;
#print("Impact coord. step 3: "~impactCoordX3~" "~impactCoordY3~" "~impactCoordZ3);
# step 4: target null heading is north pole so we have to rotate of 180 deg along Z axis.
var impactCoordX4 = -1*impactCoordX3;
var impactCoordY4 = -1*impactCoordY3;
var impactCoordZ4 = impactCoordZ3;
#print("Impact coord. step 4: "~impactCoordX4~" "~impactCoordY4~" "~impactCoordZ4);
# Step 5: rotate X,Y,Z coordinates of heading degree along Z axis
var targetHeading = getprop(targetNodePath~"/orientation/true-heading-deg")*D2R;
var impactCoordX5 = impactCoordX4*math.cos(targetHeading) - impactCoordY4*math.sin(targetHeading);
var impactCoordY5 = impactCoordX4*math.sin(targetHeading) + impactCoordY4*math.cos(targetHeading);
var impactCoordZ5 = impactCoordZ4;
#print("Impact coord. step 5: "~impactCoordX5~" "~impactCoordY5~" "~impactCoordZ5);
# Step 6: rotate X,Y,Z coordinates of pitch degree along Y axis
var targetPitch = getprop(targetNodePath~"/orientation/pitch-deg")*D2R;
var impactCoordX6 = impactCoordX5*math.cos(targetPitch) + impactCoordZ5*math.sin(targetPitch);
var impactCoordY6 = impactCoordY5;
var impactCoordZ6 = -1*impactCoordX5*math.sin(targetPitch) + impactCoordZ5*math.cos(targetPitch);
#print("Impact coord. step 6: "~impactCoordX6~" "~impactCoordY6~" "~impactCoordZ6);
# Step 7: rotate X,Y,Z coordinates of roll degree along X axis
var targetRoll = 2*math.pi - getprop(targetNodePath~"/orientation/roll-deg")*D2R;
var impactXoffset = impactCoordX6;
var impactYoffset = impactCoordY6*math.cos(targetRoll) - impactCoordZ6*math.sin(targetRoll);
var impactZoffset = impactCoordY6*math.sin(targetRoll) + impactCoordZ6*math.cos(targetRoll);
### debug
var impactHeading = getprop(impactNodePath~"/impact/heading-deg");
var impactPitch = getprop(impactNodePath~"/impact/pitch-deg");
#var impactRoll = getprop(impactNodePath~"/impact/roll-deg");
# put cursor to see the impact
geo.put_model("Aircraft/ufo/Models/cursor.ac", impactGeoCoord, impactHeading, impactPitch, 0);
### end debug
var impactYawOffset = getprop(impactNodePath~"/impact/heading-deg") - (targetHeading*R2D);
if(impactYawOffset<0)
impactYawOffset = geo.normdeg(impactYawOffset);
var impactPitchOffset = getprop(impactNodePath~"/impact/pitch-deg") - (targetPitch*R2D);
if(impactPitchOffset<0)
impactPitchOffset = geo.normdeg(impactPitchOffset);
### debug
var targetCallsign = getprop(targetNodePath~"/callsign");
print(targetCallsign~" impact coord: "~impactXoffset~" "~impactYoffset~" "~impactZoffset~"
"~impactYawOffset~" "~impactPitchOffset);
### end debug
var aiCoordList = [impactXoffset, impactYoffset, impactZoffset, impactYawOffset, impactPitchOffset,
getprop(impactNodePath~"/impact/speed-mps"), getprop(impactNodePath~"/mass-slug")];
return aiCoordList;
}
setlistener("ai/models/model-impact", test_impact);
#### End of test
〔p-kikka-base.xmlの修正〕
・p-kikka-base.xml中に下記の赤字部分を追加。
(略)
<Nasal>
<me262>
<file>Aircraft/p-kikka/Nasal/doors.nas</file>
</me262>
<guns>
<file>Aircraft/p-kikka/Nasal/weapons.nas</file>
<file>Aircraft/p-kikka/Nasal/revi.nas</file>
</guns>
<test_impact>
<file>Aircraft/p-kikka/Nasal/test_impact.nas</file>
</test_impact>
</Nasal>
(略)
[2008/04/20][2009/11/07追記][2012/12/01更新][2018/04/23刷新]
●ヒット時の爆発、煙をリアルに再現
【コメント】
ところで、機銃だけでなくミサイルや爆弾でも同様な効果を期待したい場合は、どうすればよいのでしょう。先の日本語サイトのフォーラムに紹介されたもう一つの例、「Air Ground Bombing Demo」にはA-10という機体の名が挙げられています。A-10はガトリング砲を使えば前方に着弾の煙が発生するなどかなり凝ったものです。そのsubmodels.xml中を見ると<colision>が用いられていることがわかります。ミサイルなどに関する<submodel>タグ内で<colision>とさらに<impact>をともにtrueとし、加えて<impact-report>をA-10と同じ記述をしたところ、p-kikkaのミサイルなどでも機銃同様に「Target may be hit」が表示されるとともに、爆発、煙が再現されることが確認できました。
 ↑至近で爆発したロケット弾
当たり判定の精度はかなり甘い
 爆発後に発生した煙↑
上のスクリーンショットは、カラーバーのかわりにA-10からコピーしてきたガトリング砲のファイルで、とりあえずロケット弾の爆発とその煙を再現したもの。ところでA-10では同様な画面を再現するのに、ここで紹介した当たり判定のnasalコード(のgeo put_model)を使っていません。少々結論がおかしなことになってしまいますが、FlightGearのどこかで何らかの代わる処理がおこなわれているのでしょう。画面に「Target may be hit」を表示させる必要がなければ、この当たり判定のnasalコードはなくても何ら問題なく、弾やミサイル、爆弾が命中する様を画面に再現することができるというわけです。しかもA-10では機関砲、爆弾、ミサイルで発生するスモークをそれぞれ違えています。左下の爆弾投下のスクリーンショットは、A-10のファイルを借用し、先のNasalコードは用いずに爆発の様子を再現したものです。
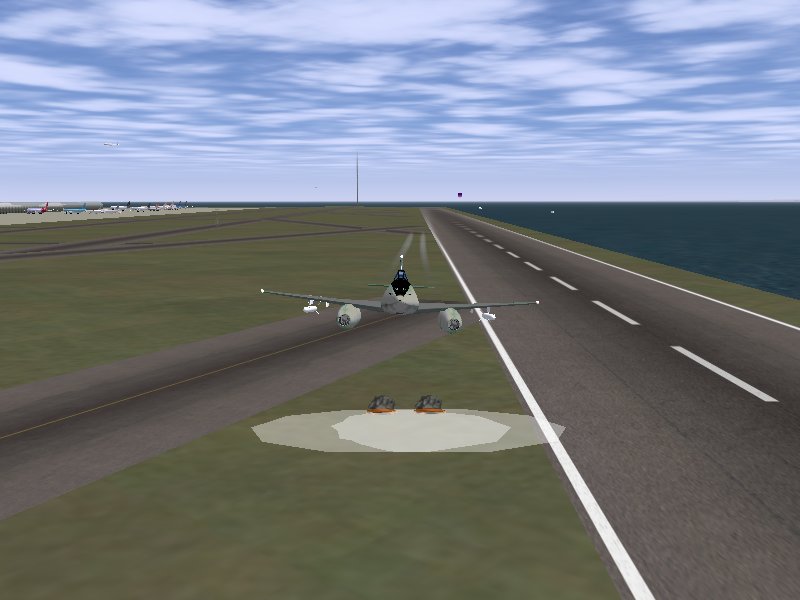 ↑爆弾投下 ww1 Aircombatの当たり判
定Nasalコードは使わず爆撃を再現。
目標物に関係なく地表に到達すると爆発
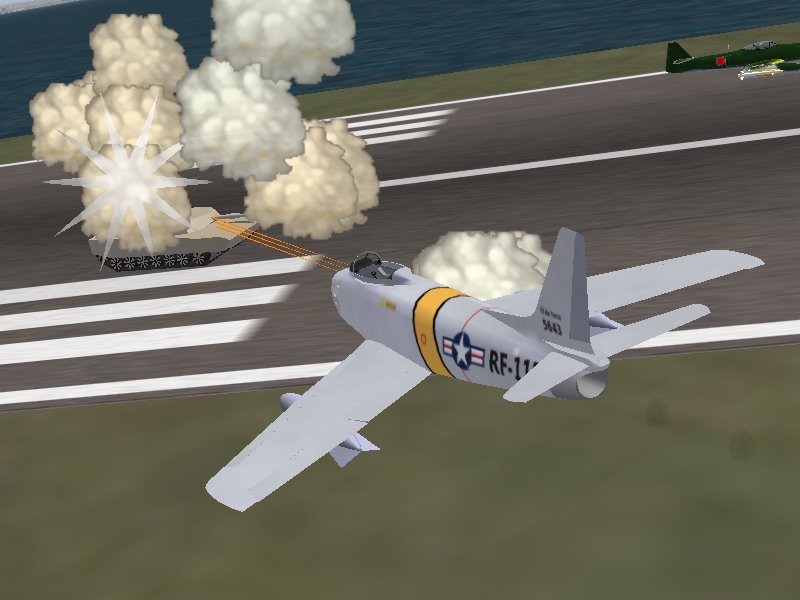 戦車を銃撃するF-86f
F-86f↑
戦車を銃撃するF-86f
F-86f↑
機銃が撃てるように改造
【実際】
〔submodels.xmlの修正〕
・p-kikkaのsubmodels.xml中のミサイルや爆弾に関する既存の<submodel>タグ中に<colision>タグをもうけ、<impact-report>を書き換えます。
(略)
<submodel>
<name>missiler</name>
<model>Aircraft/p-kikka/Models/missiler.xml</model>
<trigger>controls/armament/station[2]/missiles</trigger>
(略)
<collision>true</collision>
<impact>true</impact>
<impact-reports>ai/models/model-impact</impact-reports>
</submodel>
(略)
〔〔test_impact.nasを使う場合〕
・ww1 Aircombatの当たり判定Nasalコードを使って、銃撃などの爆発を再現したい場合は、test_impact.nas中のgeo_put_model以下の行の、UFOカーソルのacファイルを指定した箇所を、例えばA-10の銃撃による爆発と煙を再現するxmlファイルに書き換えます。
・なお、ここの例ではA-10のファイルから/Models/Stores/GAU-8Aディレクトリ以下をコピーして使用.その際、関連xmlファイル中のパス指定部分を変更(ここではp-kikkaのものに)しておきます。
#### Test purpose only ←守りましょうネ
var test_impact = func() {
(略)
# geo_put_model("Aircraft/ufo/Models/cursor.ac", impactGeoCoord, impactHeading, impactPitch,0);
geo_put_model("Aircraft/p-kikka/Models/Stores/GAU-8A/smoke-impact.xml", impactGeoCoord, impactHeading, impactPitch,0);
(略)
〔test_impact.nasを使わない場合〕
・ww1 Aircombatの当たり判定Nasalコードをまったく使わずとも、銃撃やロケット弾、爆弾の爆発を再現できます。その場合は、/Nasalディレクトリにはtest_impact.nasを置かず、前述のp-kikka-base.xmlの修正はおこないません。
・ww1 Aircombatの当たり判定Nasalコードで「Target may be hit」は表示させますが、爆発の再現にgeo_put_modelを使わない場合は、geo_put_modelの行だけを殺します。
・かわりに、submodels.xmlの先の修正に加え、<submodel-path>をもうけて爆発を再現するxmlファイル名を記述します。<submodel>中に<submodel-path>があってもよいものかはなはだあやしいですが。
・なお、ここの例ではA-10のファイルから/Models/Stores/ディレクトリ以下をすべてコピーして使用します。その際、関連xmlファイル中のパス指定部分を変更(ここではp-kikkaのものに)しておきます。
(略)
<submodel>
<name>missiler</name>
<model>Aircraft/p-kikka/Models/missiler.xml</model>
<trigger>controls/armament/station[2]/missiles</trigger>
(略)
<collision>true</collision>
<impact>true</impact>
<impact-reports>ai/models/model-impact</impact-reports>
<submodel-path>Aircraft/p-kikka/Models/Stores/GAU-8A/gau-8a-submodels.xml</submodel-path> ←この部分が今回の変更点.爆弾なら爆弾用のxmlファイルを記述する
</submodel>
(略)
〔補足:Rembrandt効果への対応〕
FLightGearに影などをもたらすレンブラント(Rembrandt)効果が導入されました。これを有効にした場合には、武器使用時にこれがヒットした際の爆発の光や煙をレンブラント(Rembrandt)効果に対応させておかないと、描画がおかしくなります。レシプロ機のプロペラの回転や風防ガラス、ジェットガスに起こる不具合と同様のものです。不具合の解消法はこちらを参照願います。
[2009/03/22][2009/04/09追加][2012/12/01更新][2013/05/02更新][2013/06/11訂正][2013/08/14訂正][2013/12/07更新][2018/04/23刷新]
●ヒット後の炎上も再現
【コメント】
※この項の記述については、現在のバージョンのFlightGearでは、すでに有効ではなくなっていると思われます。ただし、未検証。
左下は「Air Ground Bombing Demo」から借りてきた戦車が炎上する様子。前述までの爆発は攻撃する側のプログラムに記述されたものでしたが、こちらは攻撃を受けた戦車の側で炎上をプログラムしている点で異なります。p-kikkaのロケット弾でも、戦車を炎上させることができました。応用で他の3Dオブジェクトでも何だって炎上させることができそうです。
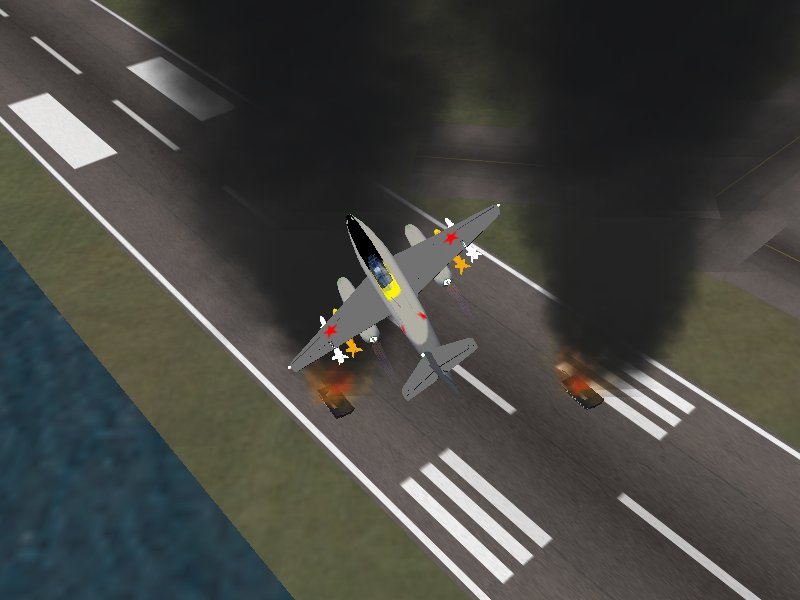 ↑炎上する戦車 攻撃を受けた戦車の側で
炎上はプログラムされている
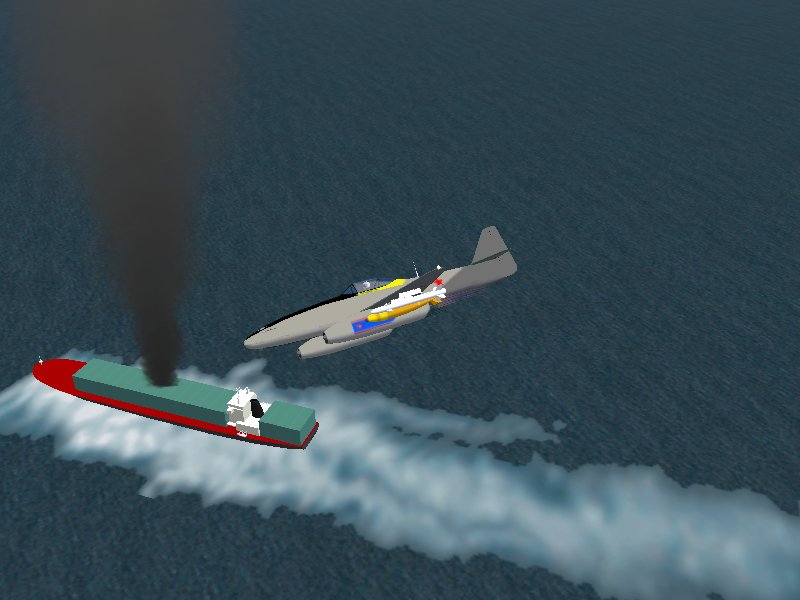 船舶も炎上↑
【実際】
〔攻撃を受ける側での炎上を他に適用する場合〕
・「Air Ground Bombing Demo」は米国本土での戦車攻撃の演習のようなAIシナリオです。http://croo.murgl.org/fgfs/AG-demo/より「scenario and Abrams model」をクリックしファイル(Nellis_Bombing_Range_20080725.xml.tar.gz)をダウンロード。解凍後生成した/AI/Aircraft/M1-Abramsディレクトリ下に、戦車の3Dモデルやスモークのファイルなどがあります。このうちのスモークをそのままの状態で利用します(対象が移動中の場合があるので、とくに黒煙の発生位置はZ軸の値を1くらいにはしておいたほうが良さそう)。
・他の3Dオブジェクトをも炎上させるには、上述のディレクトリ中にあった戦車のxmlファイル、すなわちm1.xmlファイル中の<!-- fire animations -->以下、<!-- Nasal code -->の最後までの記述を、そのまま当該3Dオブジェクトのxmlファイルに転記するだけでよいようです。丁寧に作られていますので、飛行中の機体も炎上しながら飛んでいきます。
蛇足ですが、既存の航空機の3Dモデル設定xmlファイルに同様の書き加えが行われている場合には、/AI/Aircraft/M1-Abramsディレクトリ以下が存在しないと、その航空機は起動しても画面に機体が描画されないことに注意。
ロケット弾が炸裂
1発目の爆発が白い煙となり機体が黒煙を上げはじめたところへ2発目が炸裂
[2009/03/22][2009/04/09追加][2012/12/01更新][2018/04/23刷新]
「仮想飛行」(virtual flight) by virt_fly
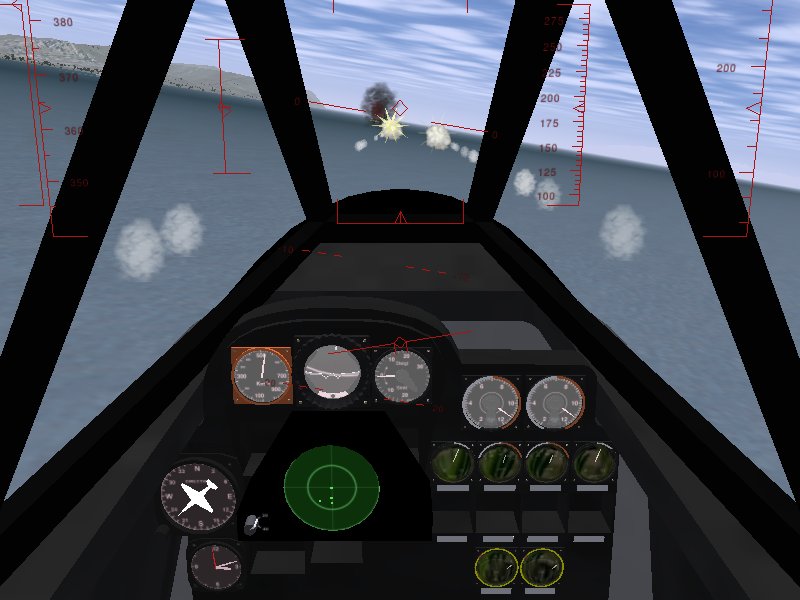
●Hit!を表示させる
【コメント】
この項をもうけたのは、FlightGearがVer.1.9.xの頃のことでした。なぜか自作した爆撃時の爆発と爆撃痕(注記参照)の再現が機能しなくなっていたのですが、particle systemや一部WildFireが使えるようになってきたことから、代わって火災が利用できないかと考え、そのためには衝突の検知ができないとはじまらない、と考えたのがきっかけでした。
何か手がかりはないものかとWeb検索してみたところ、日本のサイトのAirRacingのフォーラムにひっかかりました。これまではゲート通過時の機体本体の接触にかかわることかと思い込み見過ごしていたのですが、この時は検索のキーワードをbombingとしていたので、思い違いに気付いたものです。すなわち、機体本体でなく爆弾などの命中の判定を扱っているらしいことに。前から着陸と墜落の違いや、なぜ着艦、給油ができるのかなど、衝突あるいはあたりの判定には興味がなかったわけではないので調べてみることにしました。
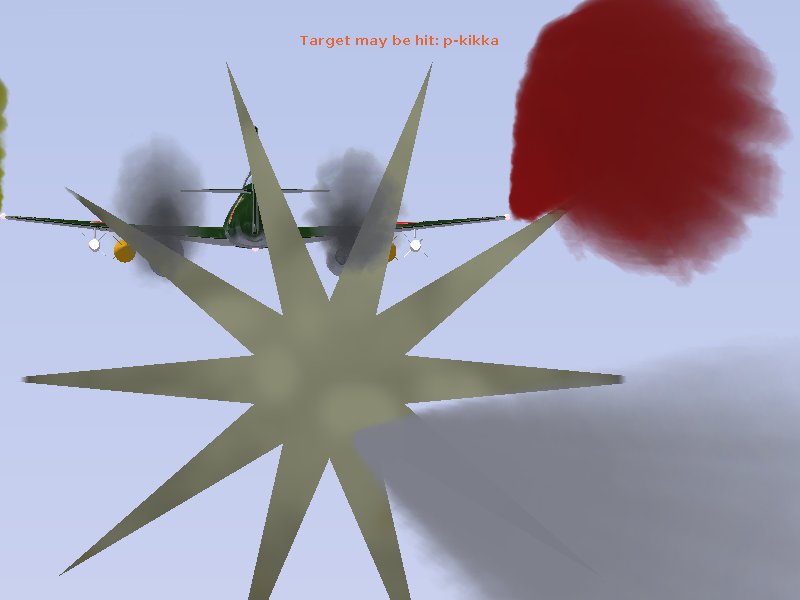
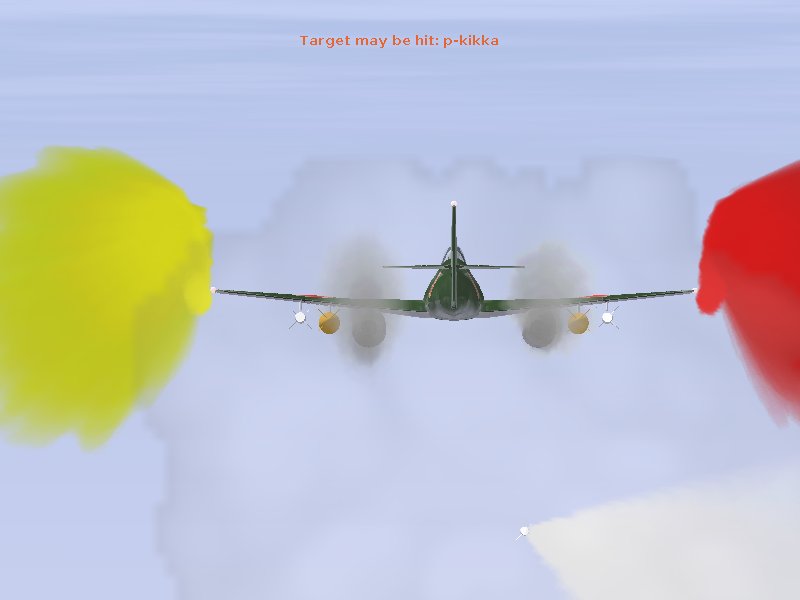
よくはわからぬままに、日本のサイトに紹介された当たり判定のNasalコード(汎用)を本家フォーラムの「ww1 Aircombat」よりコピーしてきて、適当なnasファイル名にして、愛機p-kikka(Me262を少し改変したもの)のNasalディレクトリ下に置き、p-kikka-base.xml中の<nasal>タグ内に当該nasファイル名を書き込みました。これだけで充分かは知りませんが、機銃を装備後のp-kikkaで、AI機やマルチプレーヤの相手機に銃撃を加えると「Target may be hit:○○○」(○○○はcallsign)が表示されるではありませんか。どうやら弾が当たったということのようです。サイトに紹介されているスクリーンショットを見れば、「Target hit:○○○」と表示されていますが、これは汎用性のないNasalコードの場合。また他のスクリーンショットに写っていた左右上下前後3方向のカラーの棒状のもの(UFOのカーソルに類似)も表示されるのを確認しました。
↑「Target may be hit」 スモークを引かせておけばターゲットも見つけやすい
弾があたっても撃墜されるわけでなくスモークも出ないのですが、ちなみに、UFOのカーソルに類似のカラーバーは、弾のヒットした位置を示すようなので、Nasalコードのgeo put_modelに指定されたカラーバーに代えてスモークなどを指定すれば、リアルな銃撃シーンの再現も可能といえます。FlightGearは公式的には空中戦の機能をもたないことになっていますが、かなりのことができるとわかりました。ただし、マルチプレーヤの相手機を銃撃し画面にヒットの文字が表示されても、あくまでも自機側の端末上のことであって、相手機の端末には何の変化もおこりません。せめて相手機が撃たれたことを認識できるようにしてやらなければ、空中戦は成立しません。
それにしても、マルチプレイ時に不意に「あなたは撃ち落されました」と通知されたら、嫌過ぎ。
注記)Nasalに変更があったせいかどうかわからないものの、自作の爆発と爆撃痕の再現については、FlightGear Ver.1.9導入後、機能しなくなっていたのですが、新しいバージョンのSeahawkにあるseahawk.nasの記述を使うことで、従来どおり爆撃痕を再現できるようになりました。